Saturday, June 4, 2016

Island Life is Calling


 Just a few days ago I made it back down to St. Catherines Island (SCI). This will be my second summer spent on SCI, and I thought that all the wildlife on the island deserved a chance to shine. St. Catherines is a privately owned barrier island off the coast of Georgia. It is bordered by Ossabaw to the north and Sapelo to the south. I'm hired by Georgia Southern University as a Sea Turtle Program Researcher. Here I act as part of a team that has been aiding the St. Catherines's sea turtles for 26 years. Here are some of the things I see while on the island.


Waiting on the dock for the daily 0730 boat to the island.

Saying goodbye to the mainland.
 Soon after my arrival on the island, we made our way to the beaches to complete our daily patrol. While here, we look for crawlways that indicate that a female sea turtle has come up from the ocean to attempt to lay a nest. We follow the paths of these crawlways to the nest location.
Part of a loggerhead sea turtle (Caretta caretta) crawlway on her way to lay her nest on the beach.

Here is part of a crawl way that marks a mama turtle's path up the beach from the ocean. More pictures with better lighting to come later. 

We've confirmed that this is a nest. 16-065r (the 65th documented nest on St. Catherines during 2016). Women's 9.5 foot for scale.
Habitat loss is a problem for St. Catherines beaches. Rising sea levels result in higher tides which in turn erode beaches. The places where turtles used to nest no longer exist. Because of this, we occasionally have to relocate nests to better habitat on the beach. In this case, the original nest site was in a location where spring high tides (the highest of high tides) would wash over the nest. Reptile eggs need to breathe, and if they are washed over by high tides they can drown.
Eggs from nest 16-065r.
We carefully extracted all of the eggs from the original nest site. We placed all 117 of them into a bucket with cool sand and relocated them to a newly dug nest. We have studied the shape of loggerhead nests and are able to recreate the dimensions naturally created by nesting females. In other words, we channel our inner mama turtle and dig a new nest so these eggs can continue to incubate safely.

Egg used for DNA analysis.
We take a single egg from each clutch of eggs laid. That egg is used for DNA analysis. Dr. Brian Shamblin at the University of Georgia conducts the analysis and can tell us which female lays each nest. This data show us how our conservation efforts are paying off (see article on Dr. Shamblin's work here).
Here is a look at the crawlway up to the nest. 


It's amazing the nesting season we've had so far. Last year I arrived on the island June 1st, 2015. By the end of that day, we had finished with nest 15-046r. This year, exactly one year later we finished June 1st, 2016 off with nest 16-066. The work isn't always easy, but we're here to serve the turtles. Stay tuned for more turtley pictures and other wildlife happenings.


Thursday, January 14, 2016

Homemade Cinnamon Rolls, Heaven on a Plate


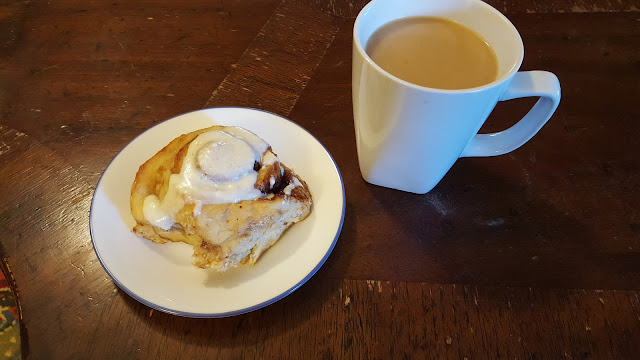
Yesterday was my sister's 18th birthday, so I figured I would surprise her with homemade cinnamon rolls when she got home from school. It's not that cold here in Georgia yet, but it's never too warm to enjoy a good cinnamon roll. 

Now, I don't really like to follow recipes (seems a little hypocritical right?). When I cook or bake, I typically have a recipe (or two) that is the inspiration for what I'm creating, but then I kind of just go off on my own and cook what feels and looks right. According to Vertamae Smart-Grosvenor, this is the art of vibration cooking--rely on your vibes to get your meal delicious. But enough, time for cinnamon rolls!

Warning: this recipe makes about 20 large rolls, so be prepared to loosen the belt or run some hot buns over the the neighbors (which is what we did since we're running out of room on our belts). 

Start with 1 cup of butter, 1 cup of sugar, and 4 cups (one quart) of whole milk. Throw that wonderful concoction into a pot and heat on med-low. You want to melt the butter and sugar and have the whole mixture blend together, but do not let it boil!! You'll have curdled milk, and no one wants that for cinnamon rolls.


+

Now remove it from heat and pour into a large mixing bowl. Allow the mixture to cool down to a warm temperature (if you're as improper as I am, you'll just stick your [clean] fingers in to test).


 Once it's warm, add 1 tablespoon of active yeast (equivalent to two 1/4 oz. packets from the store). The sugar is food for the yeast, and the warm temperature helps activate them more quickly.


Mix in the yeast, and allow it to proof for about five minutes. You'll be able to see bubbles froth in your butter/sugar/milk mixture. This 'proves' to you that your yeasties are working hard for you (yay for baking puns). 


Notice how the mixture looks frothy here thanks to the yeast

Once you know the yeast are flourishing, go ahead and start adding the all-purpose flour (a total of about 10 cups). Living better: substitute 3 cups with whole wheat flour instead. I add my flour two cups at a time and mix between each addition. While the soon-to-be dough looks like a batter, mix in 1 1/2 teaspoons baking powder
1 teaspoon baking soda
1 tablespoon salt


Continue mixing in flour until you start to form a dough. Try not to overwork the dough, but it should stop completely sticking to clean hands. I lost count, but I think I used about 11 cups of flour; you may use less. This is where the vibration cooking comes into play. Once it looks like this, cover the dough with a towel and let it rise for about an hour (protip: you can cheat and speed this up about 15 minutes by placing the dough near a heat source).


After an hour, uncover the dough and punch it down. Yes, that is right, give it your best gut punch and don't hold back (well, don't break the bowl either). This will help get the air bubbles out of the dough. If the dough is still very sticky, you can mix in up to a cup of flour. Take about half of the dough and roll it on a floured surface until the dough is evenly rolled in a rectangle.


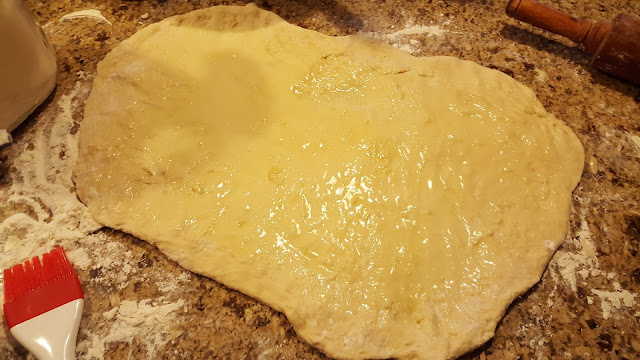
Melt some butter (maybe 2/3 stick) and brush it on the dough (you'll do the same thing with the other half of the dough.


Next grab brown sugar (about two fistfulls), and spread it all over the buttered dough. 


Next sprinkle cinnamon on top of the brown sugar, and rub it all together--don't be afraid to get your hands dirty, ladies and gents.


Now roll that thing up, and pinch the end to seal it. I brushed a little butter after I pinched it to keep it smooth. Repeat with the other half of the dough.


Take non-scented dental floss (about 10-12 inches) and shimmy it between the roll and the countertop about 2 inches in. Crisscross the dental floss over the top of the roll to cut the roll. Keep doing this every two inches.
You can use a very sharp knife too, but I've found that the dental floss is pretty easy (and one less dish to wash).
Place those rolls on a pan with some parchment paper. It doesn't matter if they bake together; they're easy to pull apart. Bake them for 15-17 minutes at 400 F. 

Those three in the middle were parts of the ends of the roll, so I basted some butter on those babies and added some brown sugar.


While they're baking, mix the icing
1/3 cup of soft butter
1/2 package of cream cheese
3 cups of powdered sugar
1 teaspoon vanilla
optional: 2 teaspoons of coffee for flavor
about 1/3 cup of milk (again, vibes. you just want enough for it to spread like icing)
just chuck all of the ingredients in a bowl and mix until it looks delicious.

Use your own vibrations with this recipe. You can make it 'healthier' using fat free milk, whole wheat flour, lowfat cream cheese.


Good morning to me. Hope you all enjoy. Cheers!


Friday, July 4, 2014

Fancy "Grilled Cheese" with Tomatoes and Basil

I love gardening so much, but right now my basil is coming in like crazy, so I have to find new ways to work it into foods!
To make this fancy grilled cheese you will need


Goat cheese
Feta cheese
Fresh minced garlic (I used two pieces of a clove ~2 t)
Ground black pepper
Tomatoes diced (I used one garden tomato--big and round and one Roma)
Fresh basil!! cut into ribbons ( I used about 20 leaves or 1/3 c)
Spinach
Whole wheat bread
Olive oil


Once the garlic is minced, tomatoes are diced and the basil is cut into ribbons, you can heat up your pan. Coat the pan in a thin layer of olive oil and place the pieces of bread on it. On one slice of bread, spread the goat cheese, and on the other slice, sprinkle feta cheese--as much as you desire. Next put spinach on one side and tomatoes and basil on the other. I next mixed the pepper with the minced garlic and spread that mixture over one side of the sandwich. Once the cheese has slightly melted, press the spinach into it (so it doesn't fall off) and place the spinach half on top of the feta half. Flip your sandwich until grilled to your desire.


I made these sandwiches for three people, so if you're thinking, "dang, this girl loves her garlic," well, you'd be correct, but those ingredients were spread among three sandwiches. I loved it, and you might need a napkin as the tomatoes tend to be juicy! Enjoy!

Friday, March 7, 2014

Shower Delights

So, showering is one of my favorite times of the day! It is one place where I can enjoy hot water and a reprieve from life--a break from social media and other people. I was offered the chance to try Tone's body wash. I didn't think that I would like the wash. I haven't always been keen on the scent of roses, but I absolutely loved the smell of this! Oh, it is so lavish and wonderful, and the wash truly makes me look forward to showering.
Cheers, loves, and happy smells and showering!

<img src="https://img.bzzagent.com/image/tone.jpg?Type=activity&Activity=4557910485&Campaign=5937789903&Uid=1452013&token=16f72ca47ad79d6bb0207702269cd875" alt=""/>

Wednesday, February 12, 2014

Feel Good, Smell Good

Let me just brag on Glade for a minute! Yesterday I was looking at being stuck inside for days as a result of an imminent blizzard on a warpath to ravage the south. Naturally I took a trip to the store to get some yummies, and while i was there, I decided I needed something to help my room smell amazing. I chose Glade products, and they didn't disappoint! They have this amazing plug-in that alternates between two scents daily. I'm currently losing myself in Sunny Days while it's cold and terrible outside. The plugin has three different strength settings, so if you have a small room like my roommate and me, then it doesn't overpower anyone who walks in the room, but it also can be strong enough to make a whole house smell delightful!! AND, when I want to mellow out, I also got some warm vanilla wax melts. They warm up the room and make me so happy! I mean, honestly unless you're allergic to scents, why not surround yourself with amazing smells all the time? It makes for a happier me (and also tricks people into thinking my room is completely clean all of the time!

Wednesday, January 29, 2014

Let's Face It

         To anyone who cares, sorry I haven't written anything in forever. I wanted to share with anyone who happens to read this poor excuse for a blog something I've discovered. I've struggled for acne for the past 3-4 years or so. I thought that I had escaped the bad skin genes, but they caught up with my in my senior year of high school. After spending time in the dermatologist's office, paying for bottle after bottle of pills (some of which were so atrocious that they made me violently ill), and slathering my face with harsh, drying chemicals, I finally called it quits, and I stopped treating my acne.
         I've noticed that French women have beautiful skin. They take such good care of their skin, especially their faces. I've started moisturizing--moisturizing like crazy! I try to keep it as natural as possible. I use a St. Ives moisturizer (trying to keep it as natural as possible). It's so important for us to keep our faces supple and lovely looking! When I told my friend that I had started trying to be conscious of moisturizing, she suggested something she does to keep her face clean: the Oil Cleansing Method (OCM). If you've never heard of this, it sounds crazy. As someone studying chemistry, I can tell you that substances comprised of similar intermolecular structure dissolve other substances structured similarly (like dissolves like). I found more in formation from the Mommypotamus Blog. So, washing your face with oil will dissolve the oils your face has produced. By washing your face with oil, you're not stripping the skin of all oil--you're moisturizing and cleaning!

Here's how I do it:
1. Find a clean glass container (an old mason jar or one of the Starbucks frappuccino bottles will do).
2. Pour your oils into the bottle (it may take some trial and error to find the types of oils and in what ratio they need to be added).
**I use 1 part castor oil (this is your astringent oil) :1 part avocado oil or jojoba oil     and finally I top it off with about 0.5-1.0 oz. of tea tree oil (oil known for antiseptic and anti-fungal qualities).
3. Take a clean washcloth, and run it under hot water (I like to use really hot water!). Place the washcloth over your face, and allow the steam to open your pores.
4. After your pores are open, remove the washcloth, and pour a small amount of the oil mixture in your hands. Massage the oil onto your face, making sure to work it into all parts of your face.
5. Rinse your washcloth out, and run it under water as hot as you can stand. Place the hot washcloth on your face and once allow the pores to open. Leave the washcloth on until it cools (this will close your pores), and then wipe off the excess oil.

Yay, you're done!

I really look forward to cleaning my face every day. It's one of the times I get to relax and destress. I know a lot of people have had a period of breakout as their faces adjust to the new cleaning method, but I haven't really noticed any rebellion from my face.

Happy Cleansing! Let me know if you have any questions!

Love,
MJ

Tuesday, April 23, 2013

Fitness is not for Pansies

So I realized something today while I was at the gym: 99 times out of 100, you give up on your body, not the other way around. It's not really your body that says you can't go further to climb that next flight of stairs, or run that extra minute, it's your head. If you tell your head to suck it up and keep pushing your body, you won't collapse.
I also realized that when people tell you to measure yourself in the morning instead of at the end of the day, they generally know what they're talking about. I measured for the first time so that I could track the progress of toning and trimming my body yesterday. Apparently you should not do that after a workout. I measured in the morning just to see what the difference would be...two whole inches off my waist and off my hips in the morning compared to what I measured in the evening after a workout.
If you haven't tried Zumba, go for it! I didn't want to do it at first; I can't dance, but it's so much fun!